Remote lighting systems are very convenient as you can operate the lights from anywhere in your house. You would no longer have to drag your sleepy and tired body out of bed just to turn off the lights in the living room. Wireless lighting systems are gaining popularity so if you are here, it means that you are thinking about getting one installed and are thinking of how to do it yourself. Read further to know how to install a wireless home lighting system the DIY way. This method is for those who do not want a battery powered switch but a self-powered one that can control all the lights in the house.
- Cut off the power supply: First thing you need to do is cut off the power supply to all the circuits you would be working with. Basically, that would be all the areas you want to control wirelessly. Confirm that there is no power flowing through the circuits by using a tester at the junction box for each circuit.
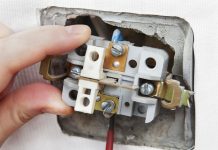
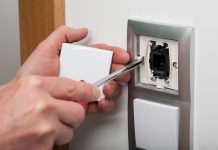
- Remove the switches: You would need to unscrew the switch cover plate, remove all the screws that are connecting the switch to the electrical box and take out the switch. Ensure that you have turned off the switch’s light breaker before you begin to unscrew.
- Replace switches with dimmers: You would need to put in the remote control, electronic dimmers (this is assuming that you already bought the dimmers). A dimmer which is capable of receiving and sending radio signals will control an area with one or more lights. The wiring connection the dimmer uses is the same the switch uses so all you have to do when you take out the switch is connect the wires to the dimmer’s connection points.
- Replace the cover plate: Once you are done connecting the dimmers, cover the electrical box again with the cover plate and screw it back on.
- Install a controller: The device comes with a set of instructions for the installation which you should follow. You are to connect the wiring for each function desired to the back of the device. You can use the controller to control all the lights in house. It is what controls the different dimmers you have installed in the walls via the radio signals that it sends out. With this, you can turn off and on as well as dim or brighten any light in your house as you desire.
Now you can easily watch a movie in your house and dim the lights without leaving the comfort of your coach or turn on all the lights in the house when you come home in the evening after work. You can set the controller to turn on all the lights at a particular time daily and some come with a microprocessor that allows daylight time savings. Thus, adjusting the time for the lights to come on as required.
Items required for this project include a cordless drill, screwdriver, non-contact voltage tester, wire cutter, wireless switch and receiver kit, dimmers and wire nuts.


